This post may contain affiliate links. Read our disclosure policy.
Today I’m showing you all my best tips and tricks for How to Make TALL Scones & Biscuits!

If you’ve been following me for a while, you might have noticed that I’m slightly obsessed with making baked goods as thick, tall, and beautiful as possible. Like they came straight out of a bakery.
There was the time I experimented with the secret techniques to getting super THICK cookies every time. Because who wants sad, flat cookie puddles?!
Or even that time I shared 3 easy tips for baking TALL bakery-style muffins.
If you know me at all, you know I fully believe baking is a SCIENCE. And the best way to quickly and easily learn that science is through mouth-watering visuals.
So today, I’m sharing the sweet science behind getting TALL scones and biscuits that rise as high as possible with those amazing flaky layers (tons of instructional photos included below!).

Sprinkle of Science
How to Make Tall Scones and Biscuits
Why Are My Biscuits Flat? Why Are My Scones Flat?
- Expired leavening agents. Your baking powder and/or baking soda could be expired. Most scone and biscuit recipes call for quite a large amount of leavening, and if either are expired, your scones simply won’t rise to beautiful heights. You can learn more about the science of baking soda and baking powder here, as well as how to test them for freshness.
- Shaping errors. More on this just below.
Why Should I Avoid Over-Kneading Biscuit or Scone Dough?
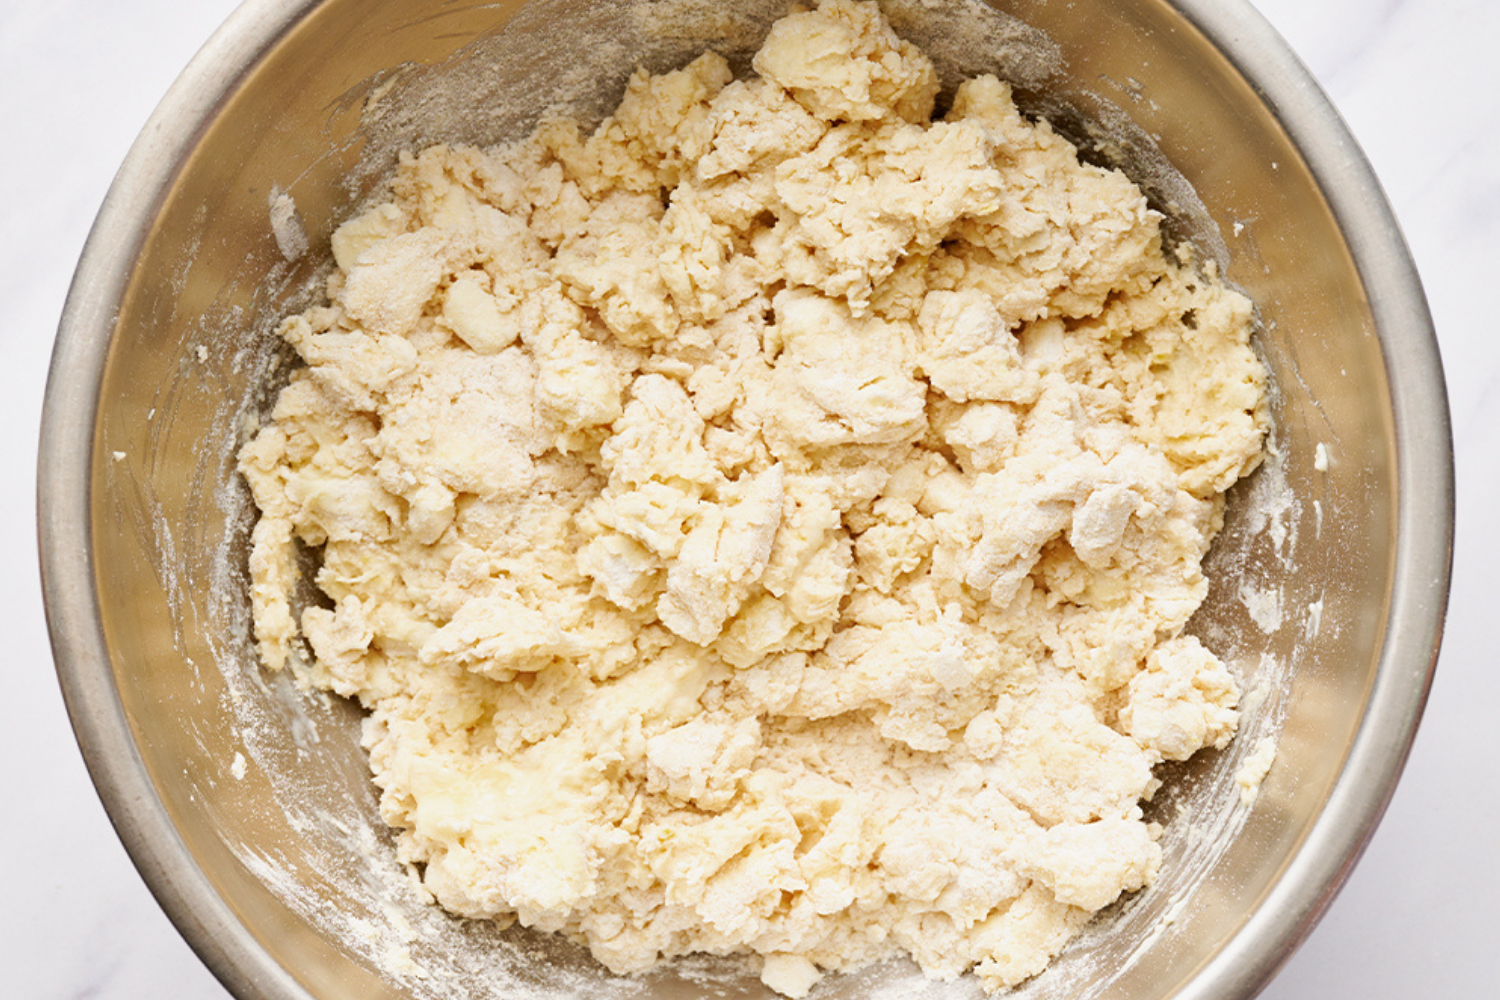
Over-kneading your dough will result in scones and biscuits that are tough, dense, or rubbery. The longer you knead the dough, the stronger the gluten network will be. We want just enough gluten for the scones to hold their shape, but not so much that we sacrifice the light and flaky texture.
Over-kneading your dough also increases the chance of your butter getting too warm. Keep reading to learn why that can cause all sorts of problems!
Use COLD Butter for Biscuits and Scones!
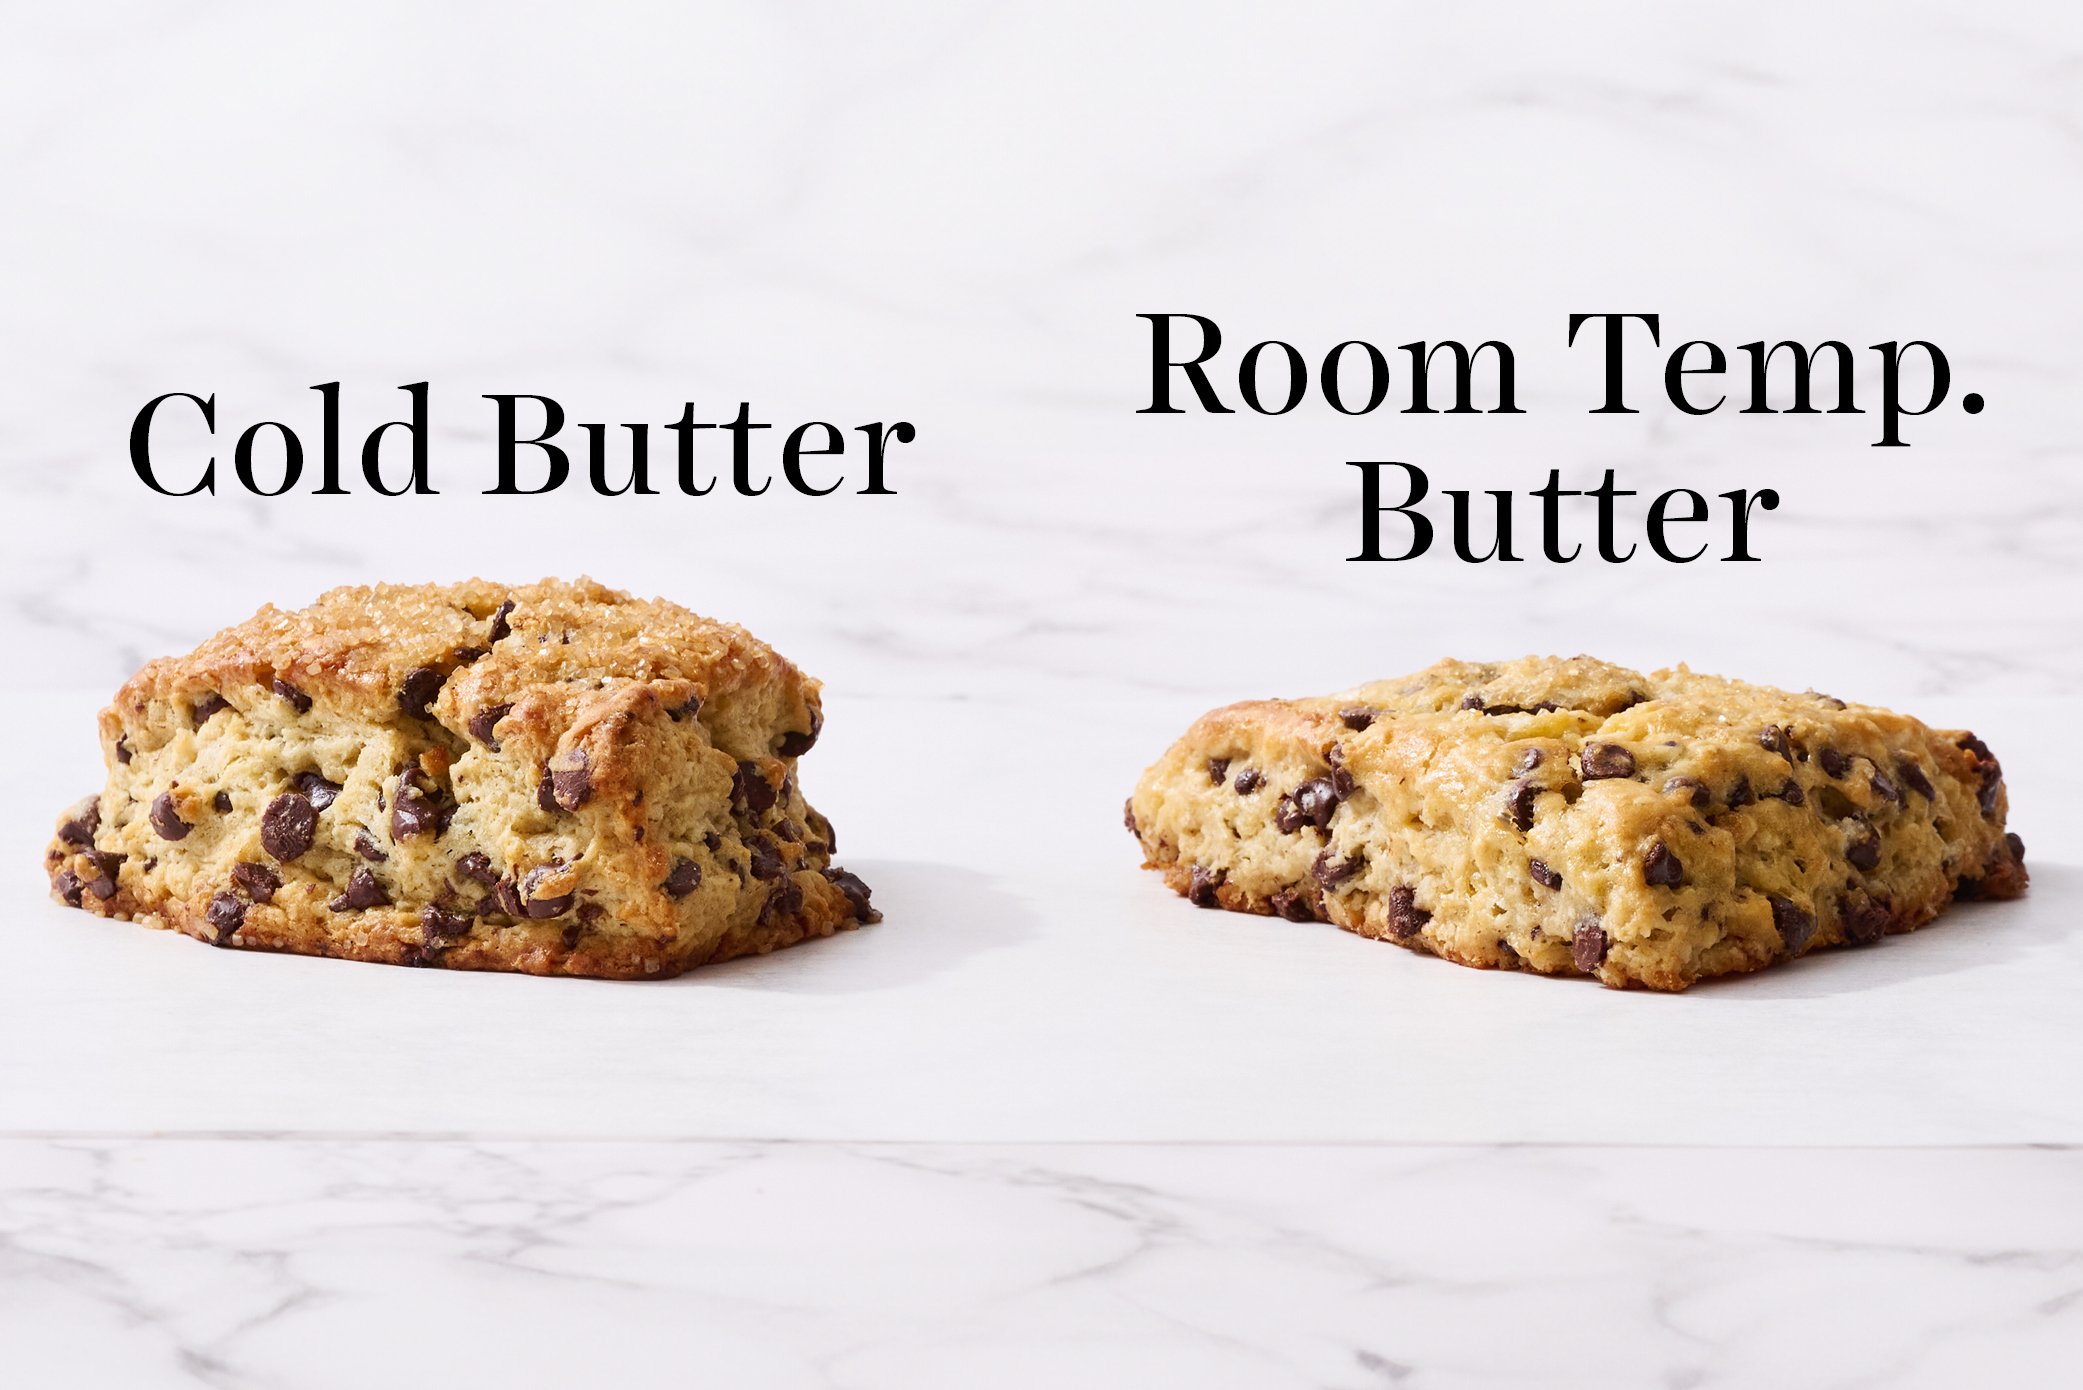
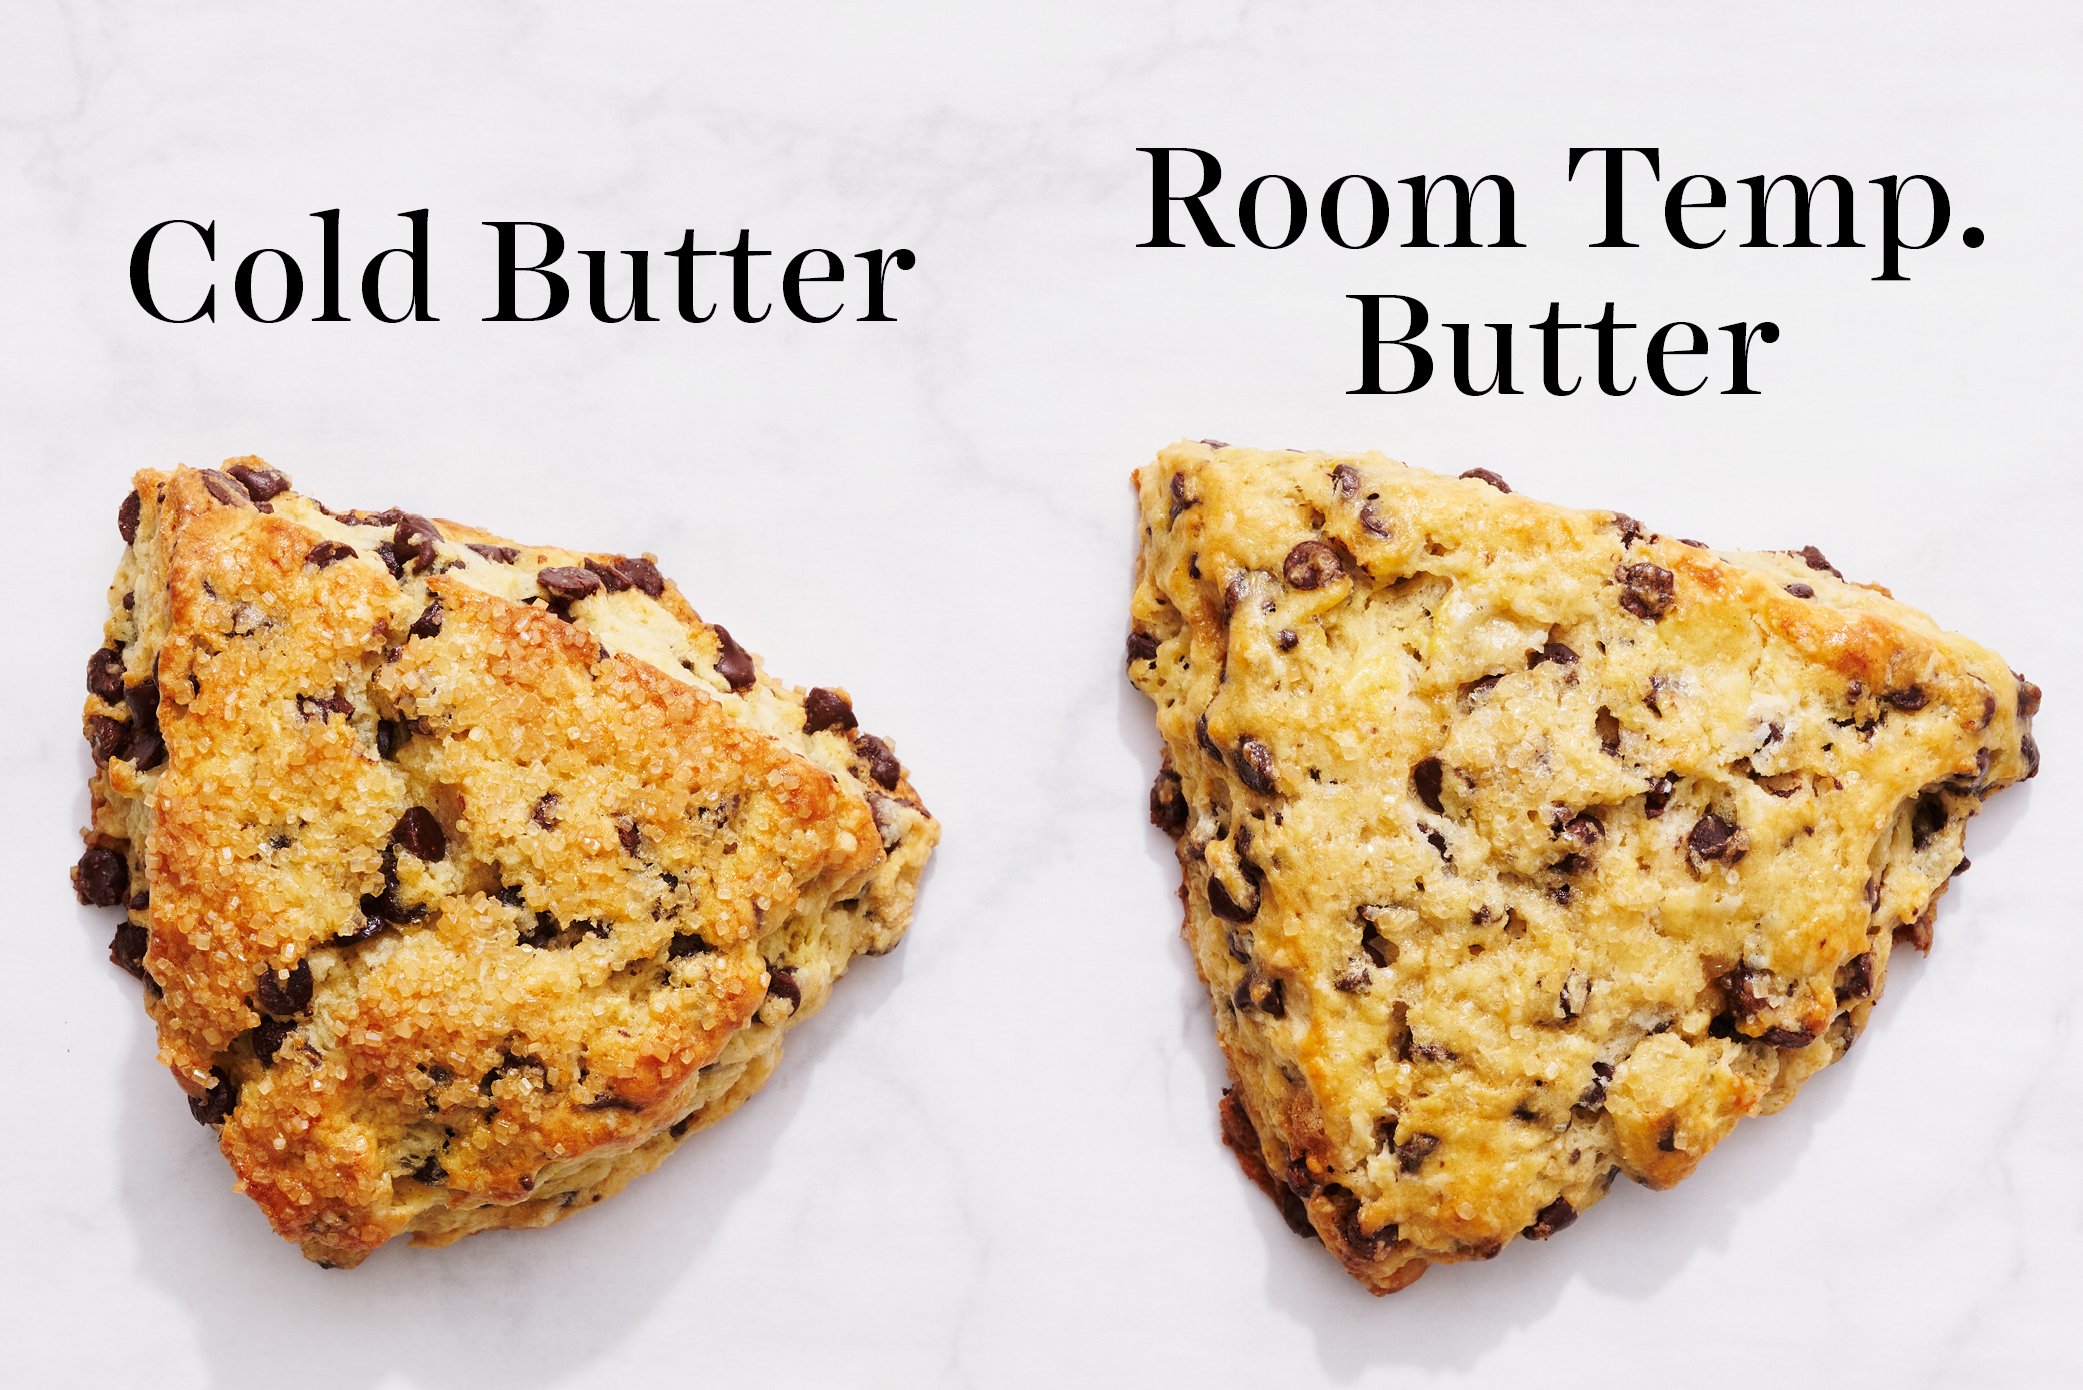
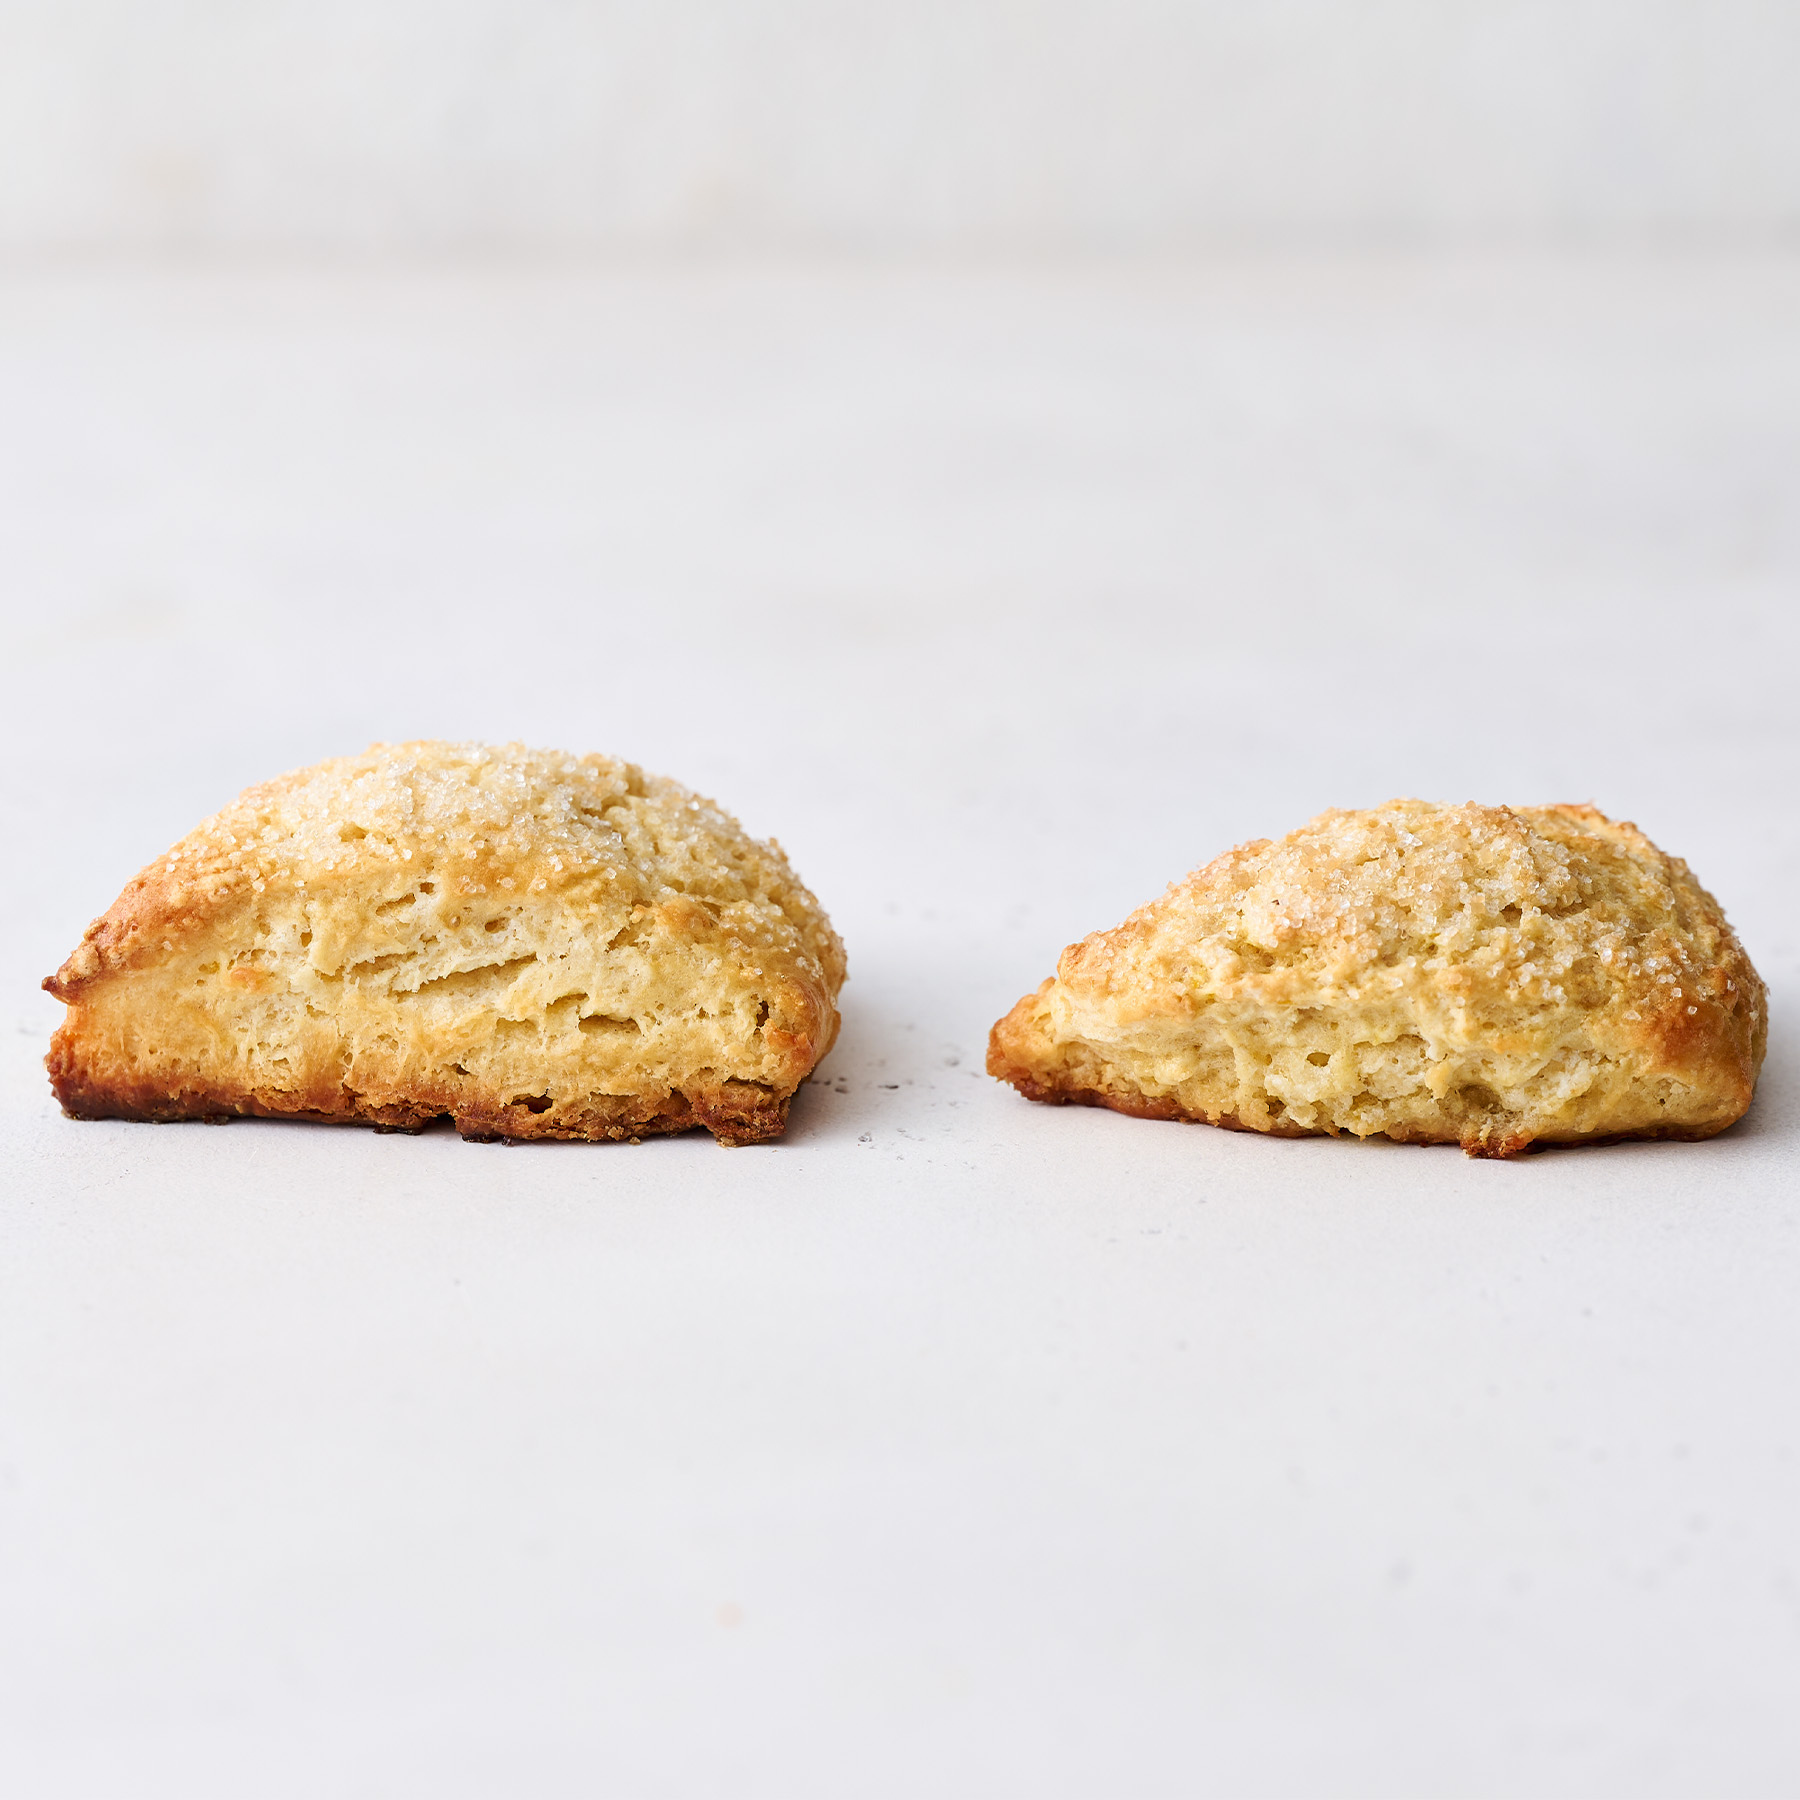
My top tip for flaky scones and biscuits is that the butter must be COLD from the start to when the dough enters the oven. The cold butter melts upon entering the heat of the oven and the water content in butter evaporates in steam. As the steam escapes, it bursts up and creates that beautiful tall, flaky, fluffy texture. I like to cube then freeze my butter before assembling the dough.
Just take a look at the photos below. One of the Chocolate Chip Scones was kept cold throughout preparing the dough and preheating the oven, and the other was allowed to come to room temperature before hitting the oven. You can see what a difference this made in the height and texture of the scones.
I also always prefer to use unsalted butter for baking – find out why here.
How to Make My Biscuits and Scones Taller & Rise Higher
Laminate your scone dough! A little bit of lamination gets scones and biscuits to shoot up sky-high with tons of flaky layers. Don’t worry, it sounds more complicated than it actually is.
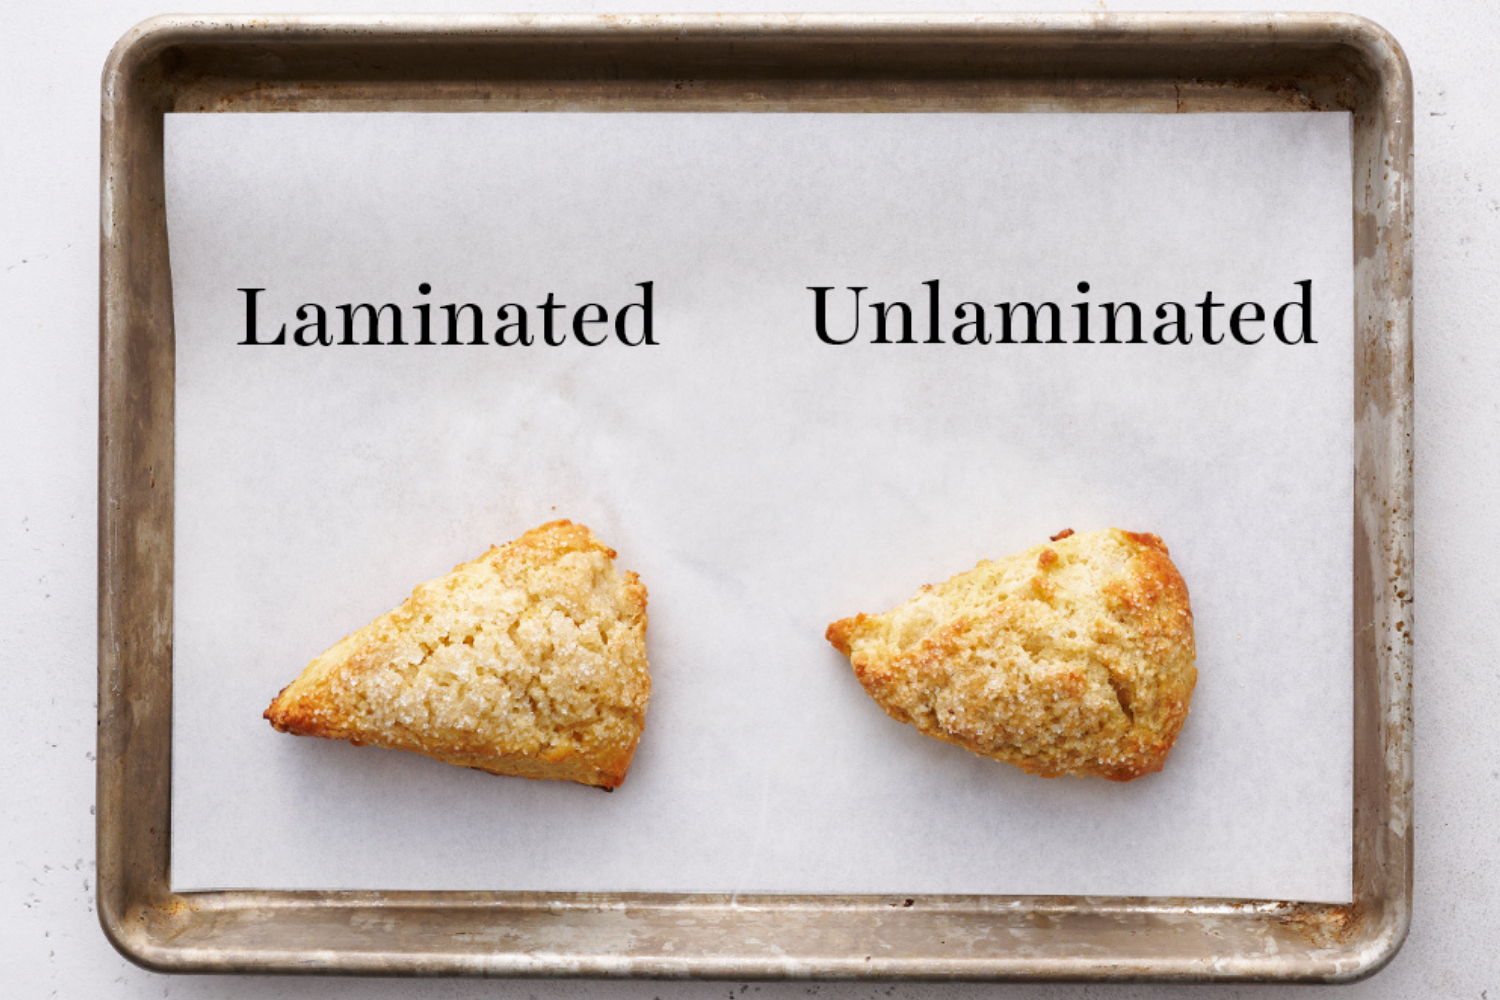
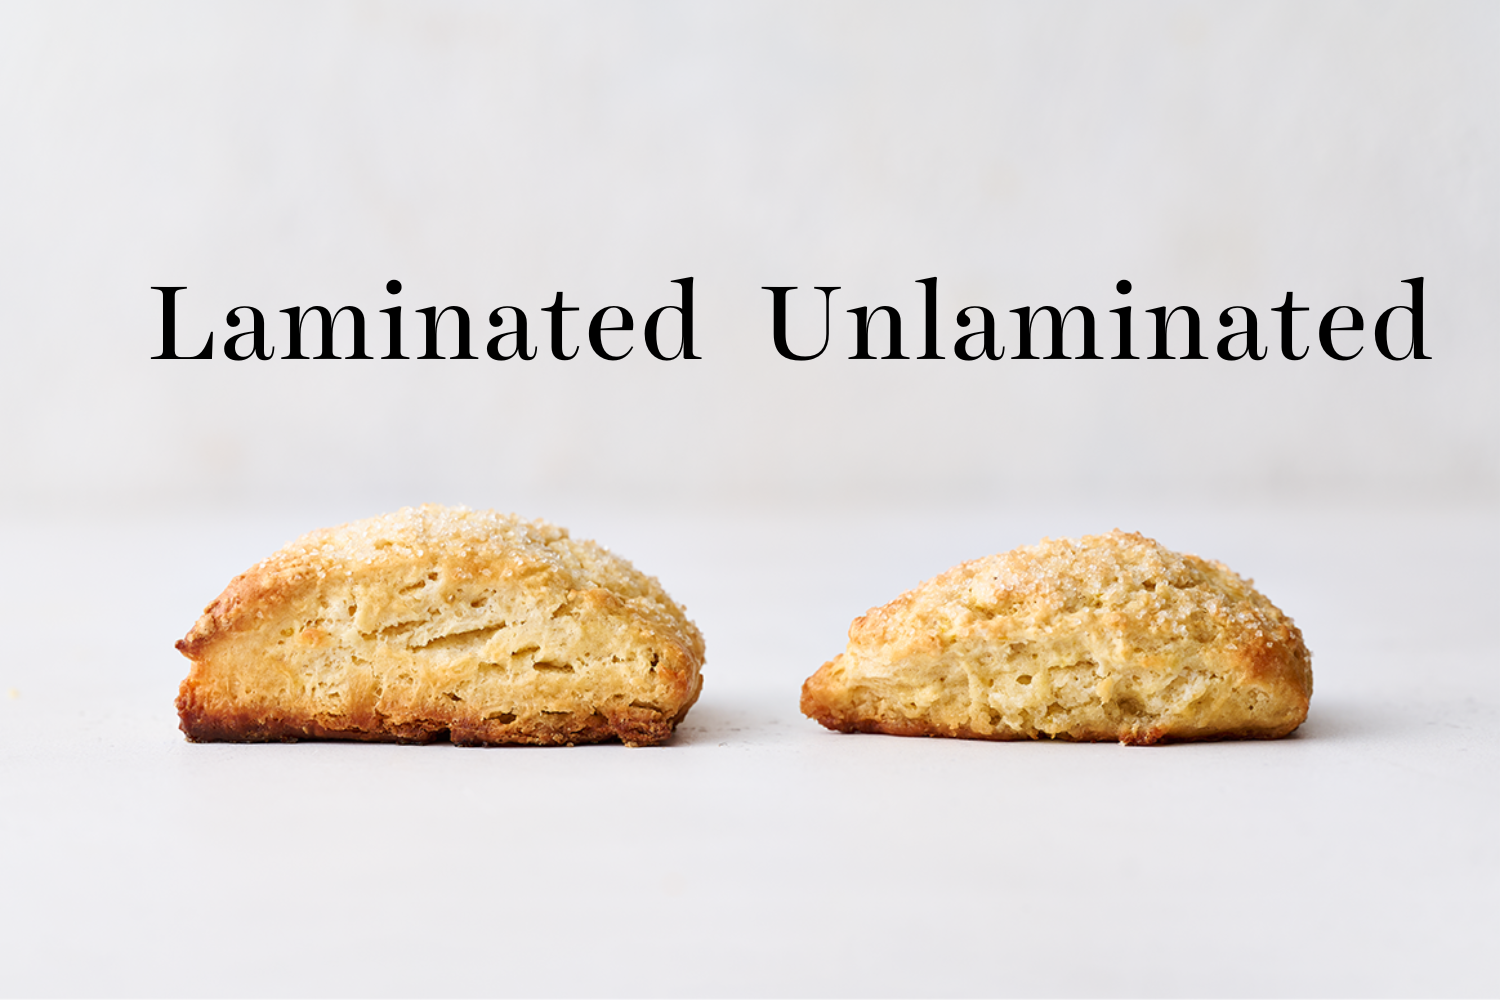
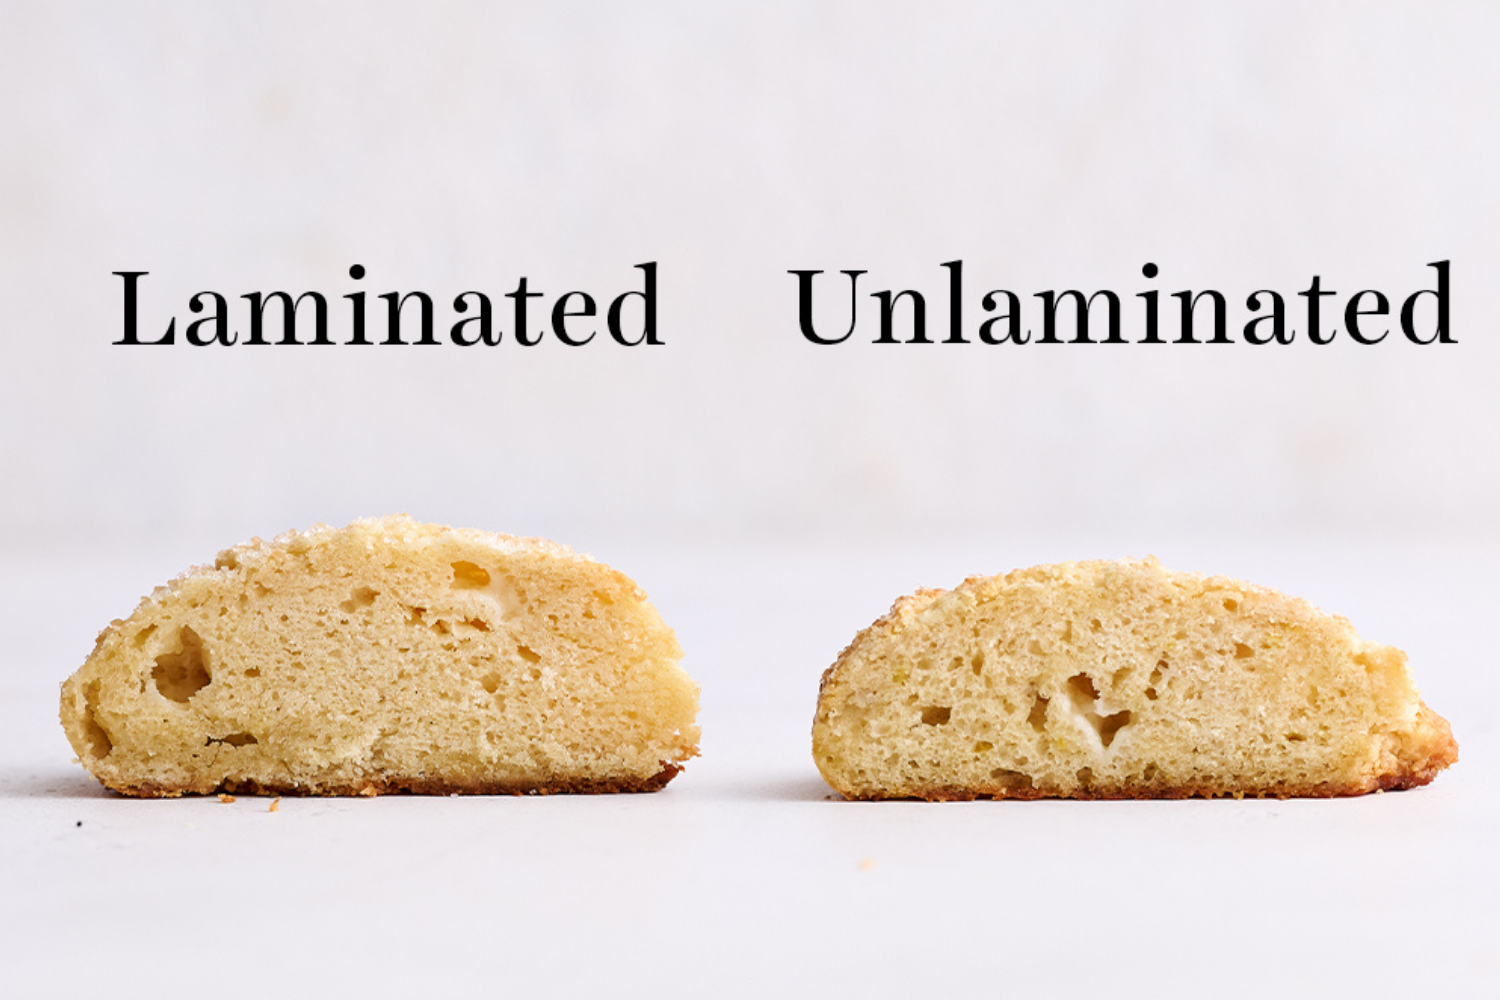
Here’s how to laminate your scone or biscuit dough:
- If adding any mix-ins, fold into dough prior to step 2.
- Turn the craggly mass of dough out onto your work surface.
- Shape it into a rectangle.
- Fold the rectangle horizontally in thirds, like you’re folding a piece of paper to go into an envelope (see photo below).
- Flatten it out into a rectangle again.
- Now fold it in thirds once more, but going the opposite direction. This will also help you to gently ‘knead’ the dough so it comes together into a more cohesive disk without overmixing it. Overmixing leads to rubbery and tough scones and biscuits.
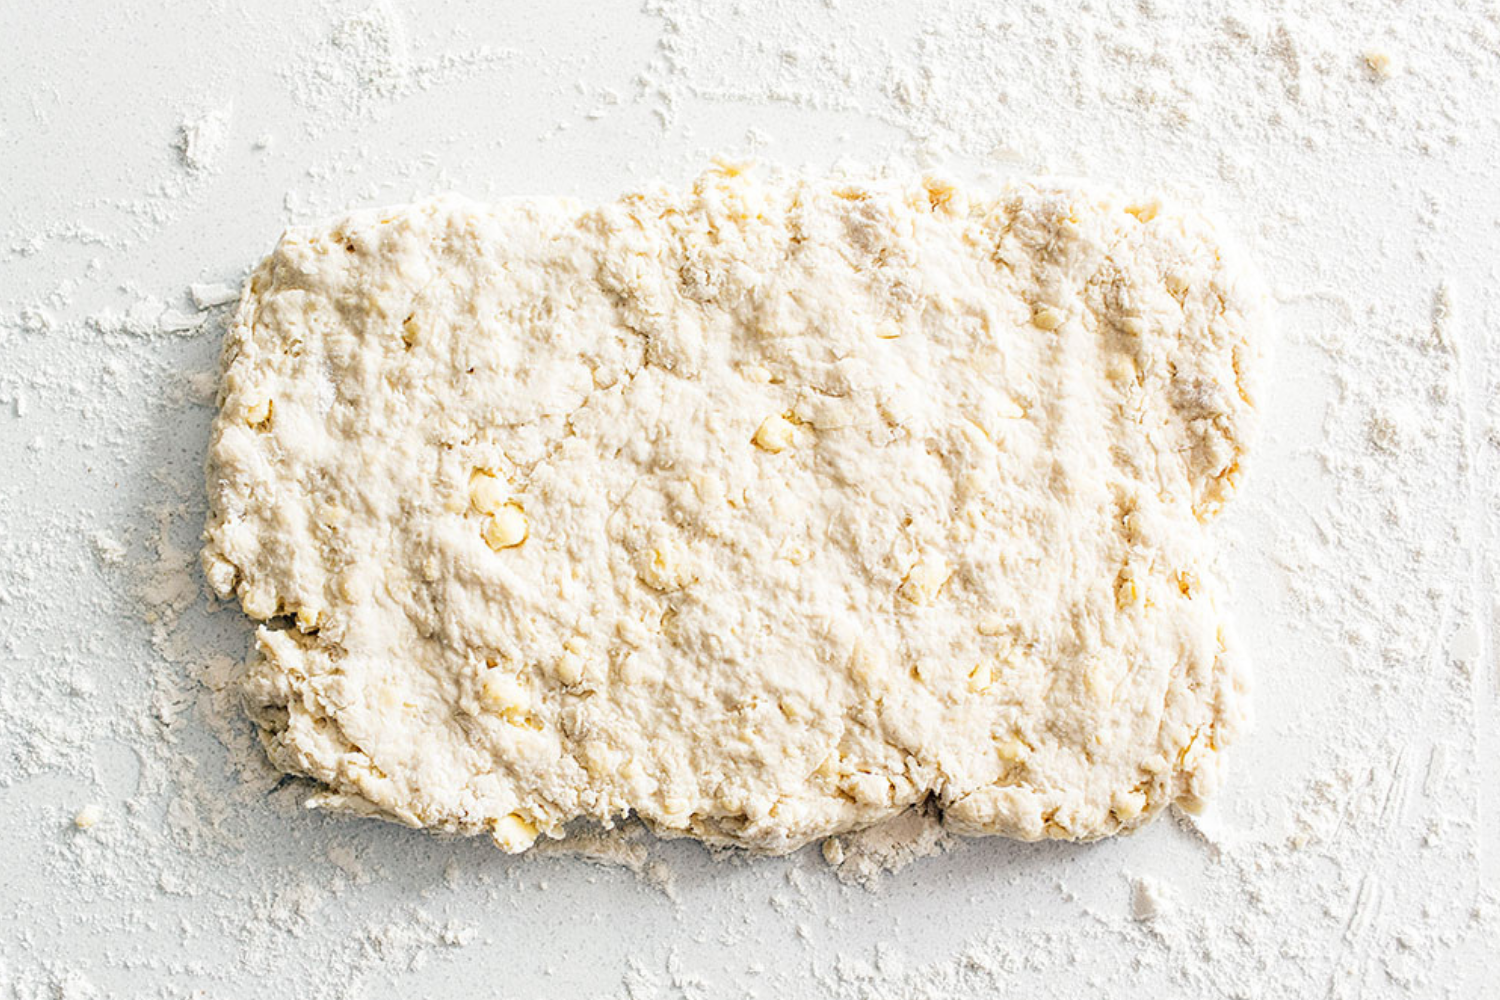
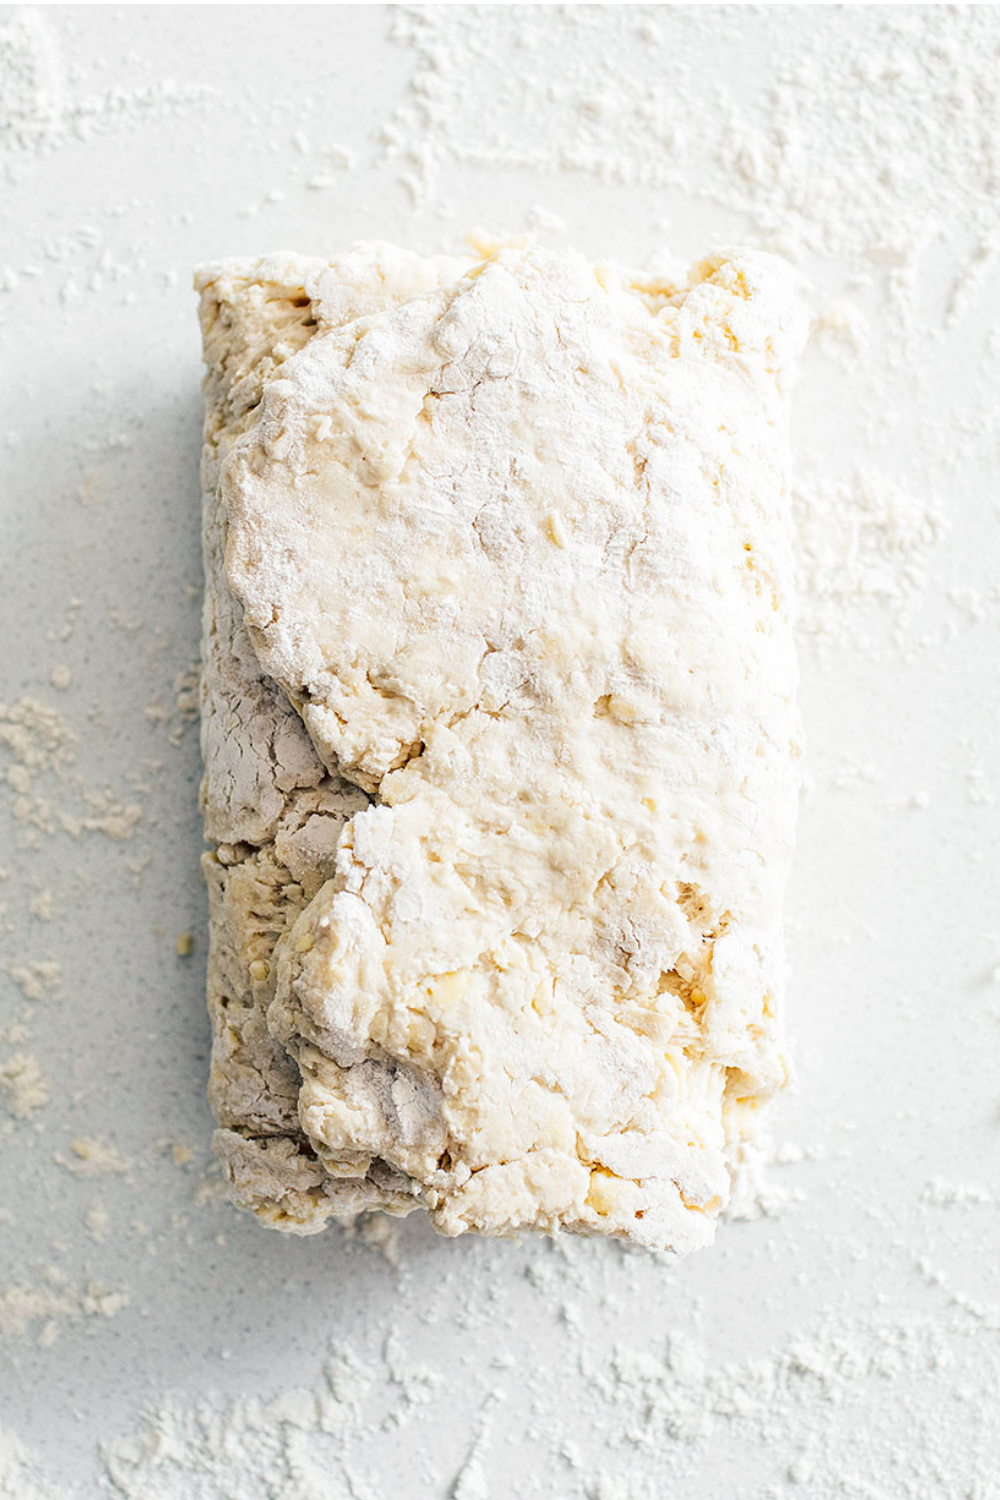
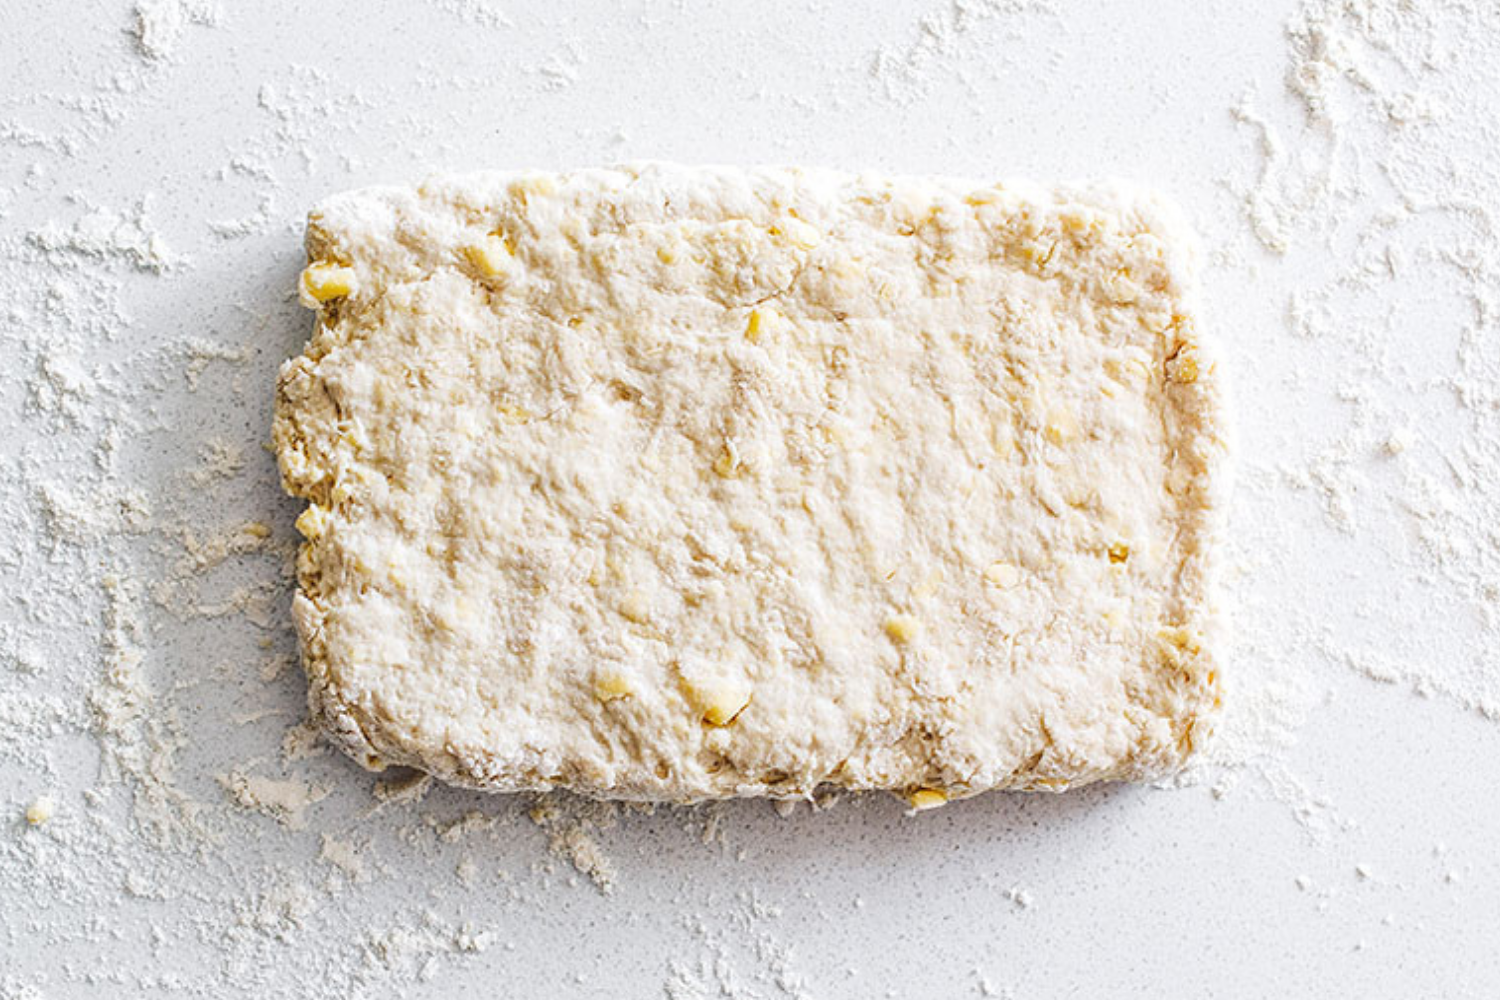
Factors That Help Scones Rise with Flaky Layers:
- Layers and pockets of cold butter
- Baking powder and baking soda
- Clean knife cuts when shaping the dough
- High oven temperature
What’s the Difference Between Biscuits and Scones?
The reason the same technique is used for achieving beautiful heights for both recipes is because they’re very similar. They both use the ‘biscuit method’ for forming the dough, which refers to the technique of cutting cold butter into dry ingredients using a pastry cutter, food processor, or a fork.
In fact, making pie dough is a similar technique, and I use the lamination trick above in my Best Ever Pie Crust recipe too!
The main differences between biscuits and scones are that unlike biscuits, scones typically include an egg and more sugar in the dough. Generally, biscuits tend to have more butter. Some scone recipes are made with cream instead of buttermilk. These small differences result in varying tastes and textures, but both are equally delicious!
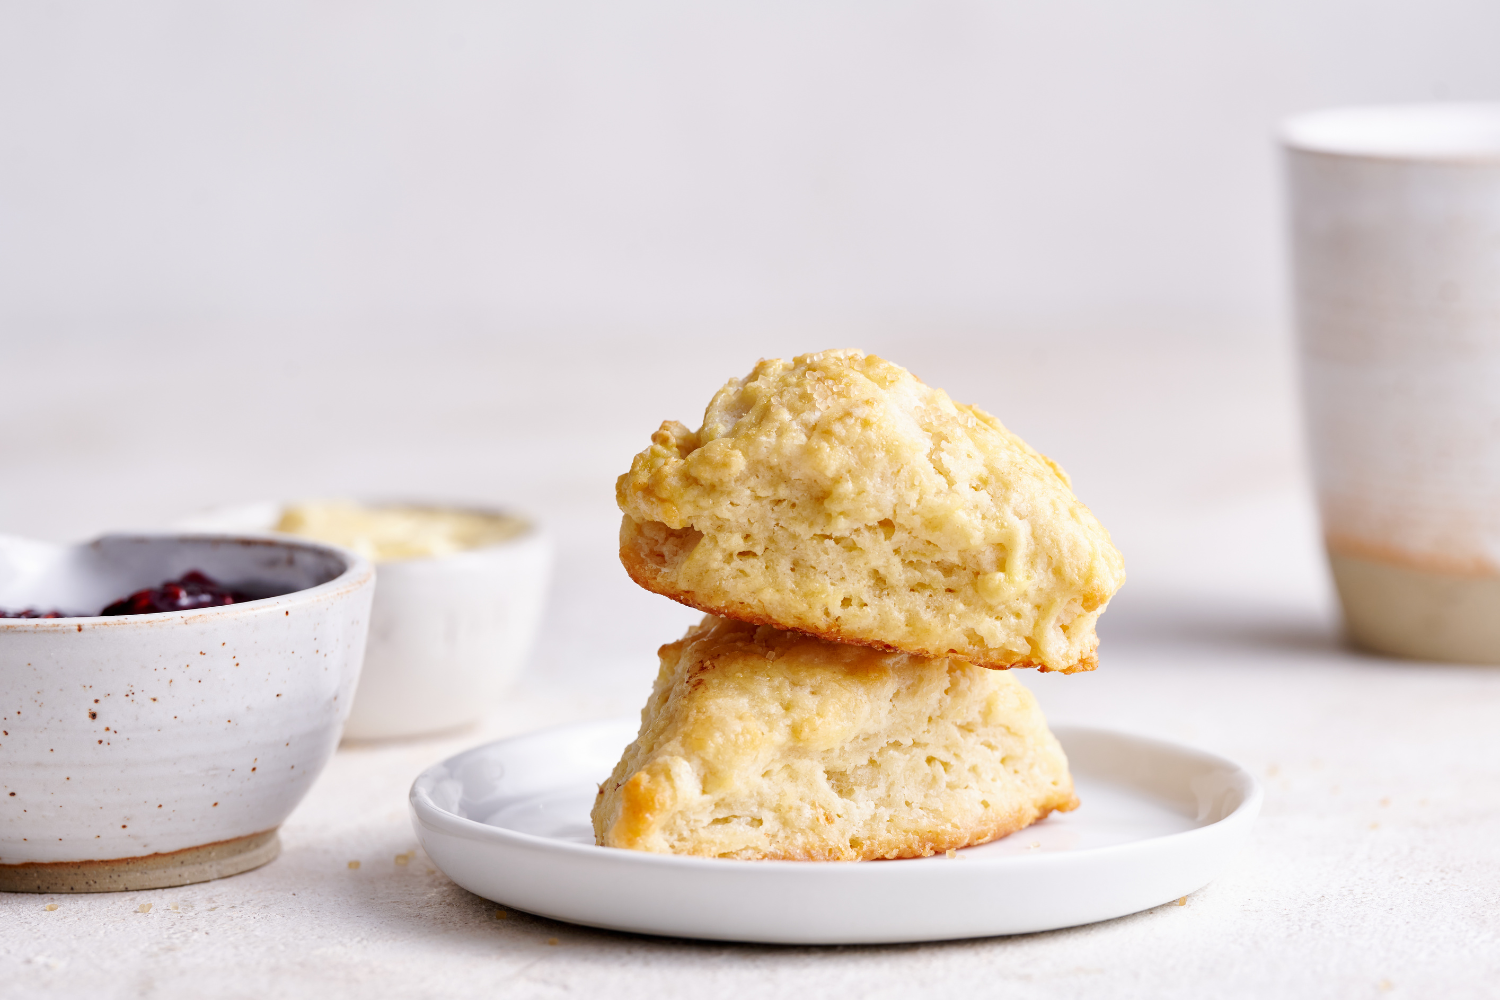
Love the science of baking? Check out all my baking experiments HERE.
Scone Recipes to Try:
- Classic Scones
- Blueberry Scones
- Shallot, Jalapeño, Goat Cheese, and Honey Scones
- Pumpkin Scones
- Cranberry Orange Scones
- Chocolate Chip Scones
Biscuit Recipes You’ll Love:
Photos by Joanie Simon | The Bite Shot and Ashley McLaughlin.
[adthrive-in-post-video-player video-id=”cfPUXCtW” upload-date=”2022-04-20T22:02:11.000Z” name=”How to Make TALL Scones” description=”Ever wondered how to make TALL flaky scones?! A little bit of lamination gets the scones to shoot up sky high with tons of flaky layers. Don’t worry, it sounds more complicated than it actually is. And if this seems like way too much work, just skip this step. You’ll still have tasty scones!” player-type=”default” override-embed=”default”]





Can I scale up the scone recipe? I’d like to make a large quantity for a brunch at church. I thought maybe I could handle making 3x the recipe at one time. Would the leavener need to be adjusted? Thank you for your thoughtful recipes and blog!!
Hi Heather! Yes, you can double or triple this recipe simply by doubling/tripling all ingredients (definitely including the leavener). I might suggest simply making the recipe individually three separate times, just to ensure that the scones are not overmixed and everything stays nice and cold – but feel free to do it however works best for you. Be sure to check out all of Tessa’s tips and tricks in the pink tip box, above the recipe, before starting – there’s some great info in there 🙂 Happy baking!
Tessa… You are the bomb! Thanks for sharing