Tessa’s Recipe Rundown
Taste: Red velvet + cream cheese frosting just belong together!!
Texture: The cookies are slightly crunchy at the edges but still a little soft in the middle.
Ease: Not quite as easy as drop cookies but all the more fun 🙂
Pros: Festive twist on sugar cookies.
Cons: These require 1 1/2 hours of chilling time.
Would I make this again? Yes! I’ve been making these for years.
This post may contain affiliate links. Read our disclosure policy.
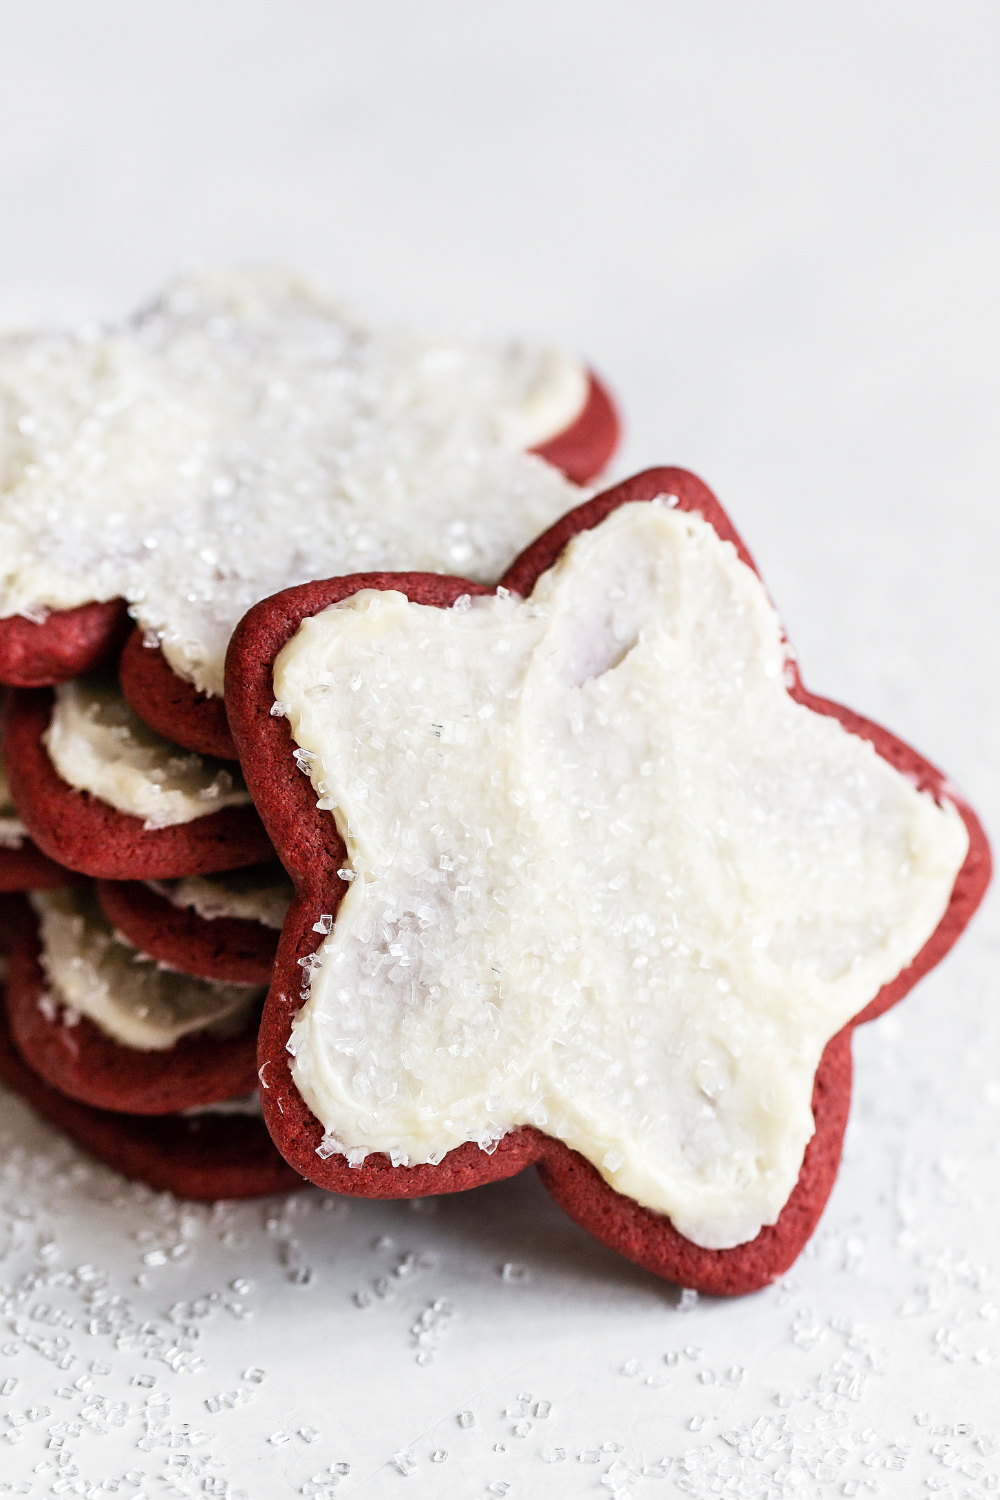
These Red Velvet Cookies with Cream Cheese Frosting are about to be the most popular cookie on your party table!
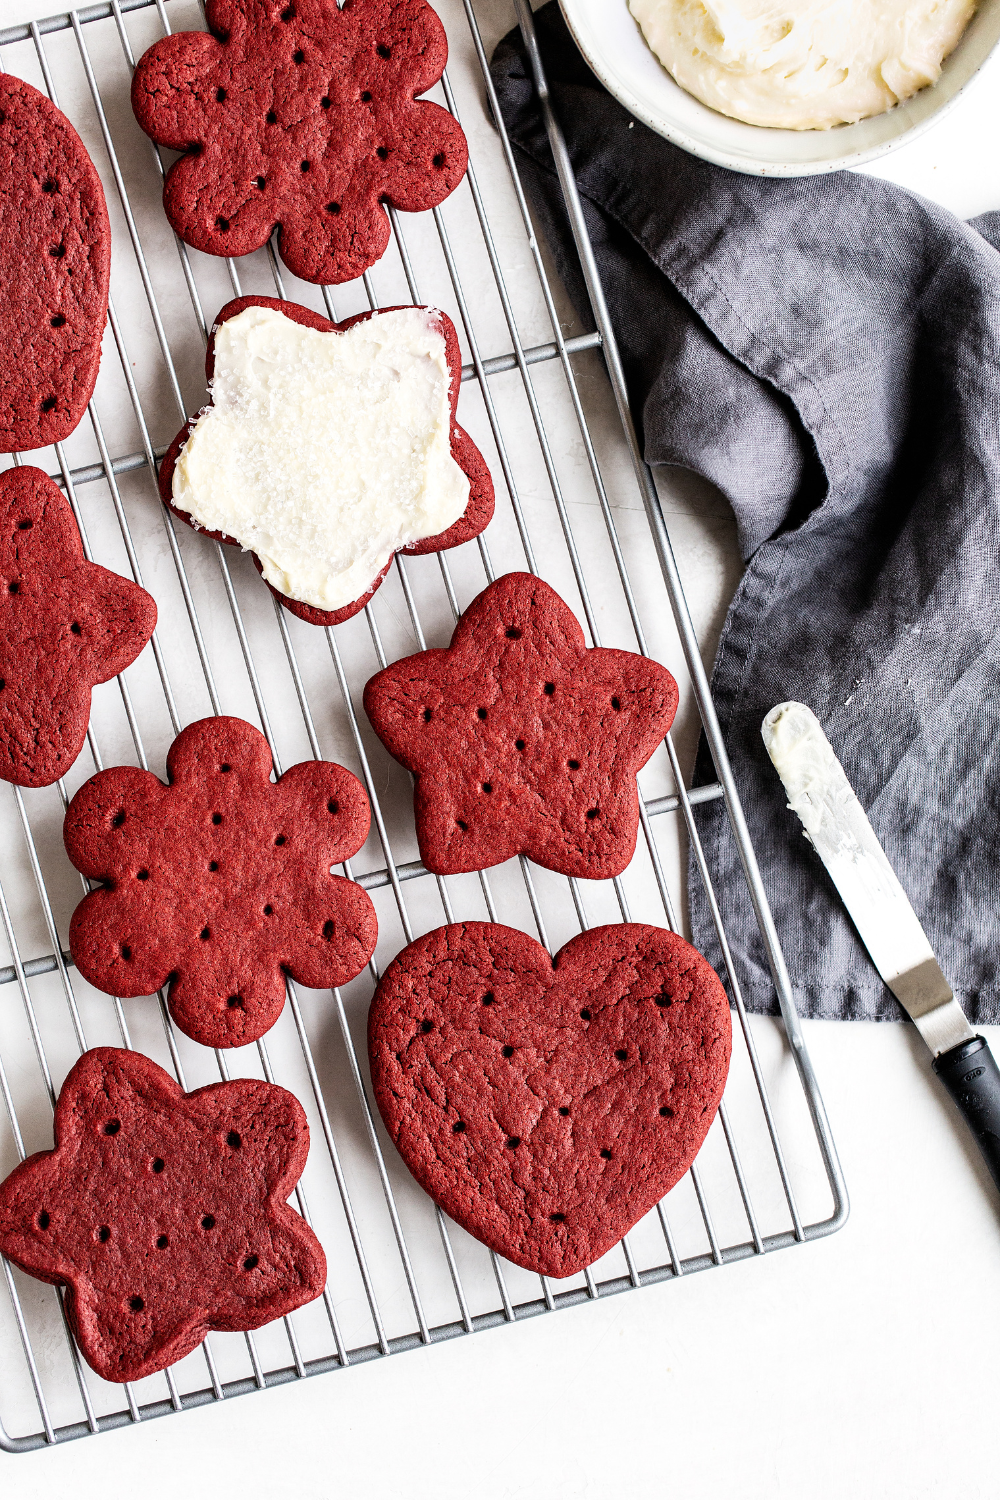
I love that these cookies are a fun new take on a classic cut-out cookie.
The creamy, tangy cream cheese frosting really brings these adorable cookies to a whole new level.
These Red Velvet Sugar Cookies are super versatile, too. They’re perfect to add a beautiful splash of color to any Christmas cookie platter. Ideal for your 4th of July cookout. Or anytime you need a cute dessert for a potluck that’ll please adults and kids alike!
I hope this recipe becomes a family favorite!
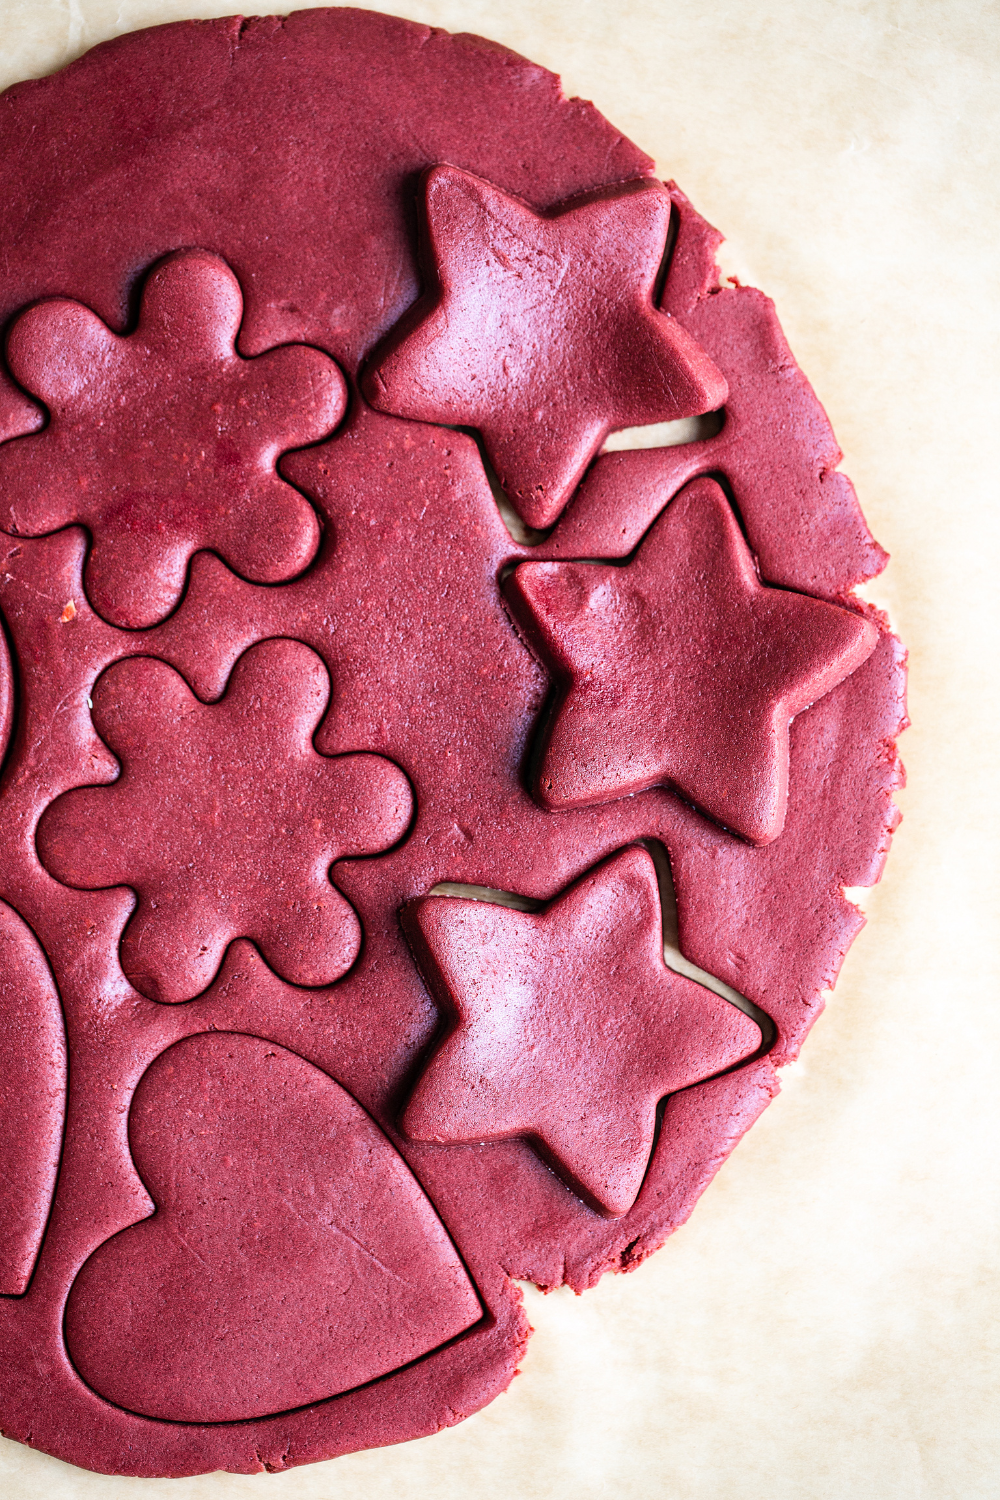
How to Make Red Velvet Cookies with Cream Cheese Frosting
Do I Have to Chill Red Velvet Cookie Dough?
Yes – but not for a long time. Chilling this dough for an hour or so, and then again as the oven preheats, ensures these cookies keep their shape and prevents them from spreading. They’re worth the wait, I promise!
What is the Best Food Coloring for Red Velvet Cookies?
- For brilliant, vibrant Red Velvet Cookies, I like to use gel food coloring. Specifically, Americolor Super Red gel coloring. It’s available on Amazon or at some specialty cake decorating stores.
- If you can’t find that, then Wilton’s gel food coloring is the next best option. You want to make sure to get the pot of Wilton food coloring that says “concentrated paste,” not the ones that are in little squeeze tubes. Those aren’t as vibrant.
- Don’t use ‘decorative red icing’, which is meant as the final icing product and not as an ingredient to color icing.
- Avoid using liquid food coloring. It isn’t as concentrated and will add a lot of excess liquid to your cookie dough, changing the consistency of the final product.
- Wondering if you can use natural dye? Learn more about Natural vs. Artificial Food Coloring here.
The Best Baking Pans for Cookies
I ALWAYS use an unlined aluminum half-sheet pan, like this one, for baking cookies. Additionally, I always use parchment paper for baking cookies. Never use dark-colored pans to bake cookies, as they tend to overly brown or even burn the bottoms of the cookies. Learn more about the best (and worst!) baking pans for cookies in my post here.
Tips for Rolling Out Red Velvet Cookie Dough
- Place the dough between two large sheets of parchment paper or plastic wrap and roll the dough out that way. It’s SO much cleaner and easier. You could use silicone baking mats, but you’ll be limited to their size, so you may need to divide the dough into 3 portions before rolling out instead.
- Roll the dough out to a 1/4-inch thickness. If you want thicker, softer Red Velvet Cookies, go slightly thicker than that.
- If the dough is too firm to roll out, let it sit at room temperature for 5 to 10 minutes before rolling. If it becomes too soft, pop it in the fridge or freezer until it’s firmed up.
- Using a tall metal cookie cutter helps to get the cleanest shapes.
- I like to stamp out the shapes then use the bottom parchment piece to help peel the dough away without damaging the shape at all.
Can I Make Drop Cookies with This Recipe?
This recipe was designed for cutting out shapes, but if you want drop-style cookies, give my Red Velvet Crinkle Cookies a try instead.
Tips for Making Cream Cheese Frosting for Cookies
- Make sure your cream cheese and butter are completely softened to room temperature.
- Use high-quality, full-fat bricks of cream cheese, and don’t use cream cheese in tubs meant for bagels.
- Sift the powdered sugar before adding it to the frosting.
- Scrape down the sides of the bowl often.
- If you want a thicker frosting, add more powdered sugar.
- You could also use a more generous layer of cream cheese frosting and create sandwich cookies instead!
- Get all my tips for the best cream cheese frosting here.
Can I Use a Different Icing?
Sure! If you’re looking for a frosting to pipe and decorate like a classic cut-out sugar cookie, check out my easy cookie icing recipe. If you prefer classic buttercream, use my Best Buttercream Recipe instead.
How to Make Red Velvet Cookies Ahead of Time
Unfrosted Red Velvet Cookies will keep in an airtight container at room temperature for up to 1 week. Once the cookies are frosted, store them at room temperature for up to 1 day. If you need to prep these Red Velvet Cookies further in advance, check out the freezing instructions just below.
How to Freeze Red Velvet Cookies with Cream Cheese Frosting
Cut-out cookies are best stored already baked; unlike drop cookies, which I like to store as frozen balls of dough. Freeze the baked, cooled Red Velvet Cookies in an airtight container for up to 1 month. I prefer a sturdy airtight container for freezing baked cookies, to protect the cookies from other items in your freezer and prevent the cookies from breaking.
More Recipes You’ll Love:
- Easy Cut Out Sugar Cookies
- Red Velvet Cake
- Red Velvet Crinkle Cookies
- Snickerdoodle Recipe
- Soft and Chewy Sugar Cookies
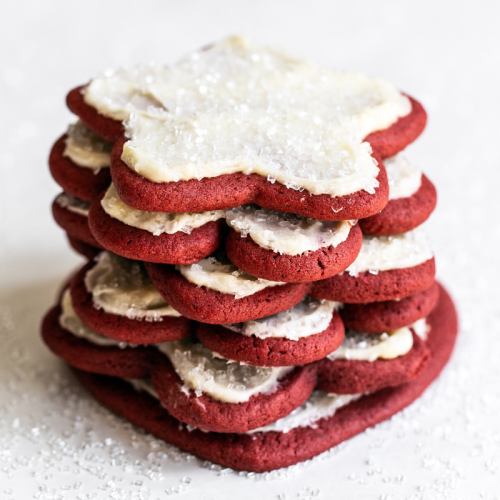
Red Velvet Cookies with Cream Cheese Frosting
Ingredients
For the cookies:
- 3 cups (381 grams) all purpose flour, plus more for dusting
- 1/4 cup (21 grams) unsweetened cocoa powder
- 21/2 teaspoons baking powder
- 1/8 teaspoon fine salt
- 1 1/2 sticks (170 grams) unsalted butter, at cool room temperature
- 1 1/2 cups (300 grams) granulated sugar
- 2 large eggs, at cool room temperature
- 2 teaspoons pure vanilla extract
- 1 teaspoon
red gel food coloring
For the frosting:
- 4 ounces (113 grams) cream cheese, at room temperature
- 4 tablespoons (57 grams) unsalted butter, at room temperature
- 2 teaspoons vanilla extract
- 1 cups (125 grams) powdered sugar, sifted (don't skip sifting!)
Instructions
Make the cookies:
- In a medium bowl sift together the flour, cocoa powder, baking powder, and salt. Set aside.
- In a large bowl, use an electric mixer to beat the butter and sugar on medium high speed until well combined and smooth, about 2 minutes. Add the eggs, one at a time, until combined. Add the vanilla extract and food coloring until combined. On low speed, add the flour mixture and beat until just combined. Wrap the dough in plastic wrap, pat into a disk shape, and chill in the refrigerator until firm, about 1 hour or up to 2 days.
- Line large baking sheets with parchment paper. Place the chilled dough in between two large pieces of parchment paper or plastic wrap on a work surface. Roll the dough out to a 1/4-inch thickness. If the dough is too firm, let it sit at room temperature for 5 to 10 minutes before rolling. Using a tall metal cookie cutter, carefully cut out shapes from the dough and place on the prepared baking sheets.
- Chill the cookie dough on the baking sheets in the refrigerator for 30 minutes or until firm. Meanwhile, preheat oven to 350°F.
- Remove the baking sheets from refrigerator and prick the dough all over with the end of an instant-read thermometer or the blunt end of a skewer. Bake for 10 to 11 minutes, or until the cookies are set. Let cool on baking sheets for 5 minutes before removing to a wire rack to cool completely.
- Cookies can be stored in airtight containers in freezer for up to 1 month.
Make the frosting:
- In the bowl of a stand mixer fitted with the paddle attachment, beat the cream cheese, butter, and vanilla on medium-high speed until very light, creamy, and smooth. On low speed, gradually add in the sugar and beat until fluffy.
- Spread frosting over each cookie with a small offset spatula. Decorate with sprinkles if desired. Serve store in an airtight container in a single layer, or between pieces of parchment paper, for up to 1 day.
This post was originally published in 2019 and has been updated with additional recipe tips. Photos by Ashley McLaughlin.


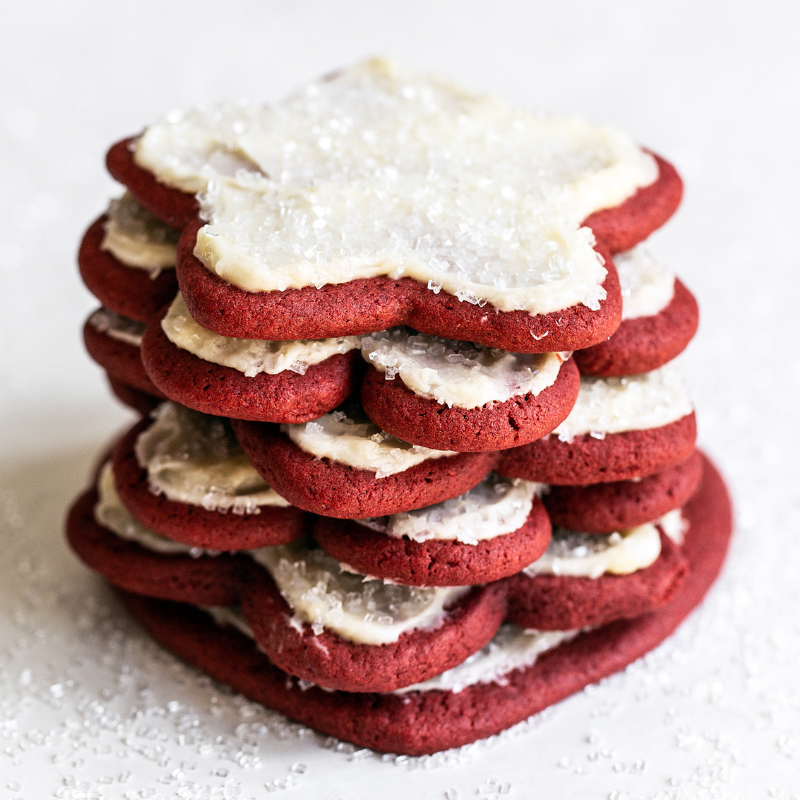






I made these cookies for Valentine’s Day using heart cookie cutters and they were stunning. Even before the frosting, a dusting of powdered sugar looks gorgeous. A reminder that these continue baking on the pan, so don’t let them get too crispy in the oven.
Beautiful! So glad you enjoyed these, Kate!